3D Printing Winged Victory Statue

3D Printed Winged Victory Statue Fathom
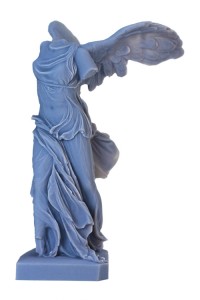
The statue Winged Victory of Samothrace is one of the most recognizable works of art from Hellenistic Greece. Created by an unknown artist between 220 and 185 BC, experts believe the statue stood on the marble bow of a sculpted warship in commemoration of a naval victory. This month marks 151 years since it was unearthed by Charles Champiseau on April 15, 1863 and later put on museum display. In honor of this day, the Fathom team 3D printed a miniature version at its Oakland production center. To learn more about this 3D printed part and the topic of 3D printing ancient artifacts, we met with Fathom Prototyping Studio Manager Tony Slavik for a few questions.
Fathom’s production centers in Oakland and Seattle offer a variety of advanced manufacturing technologies and many different material options to choose from — what material did the team choose and why?
Tony: We chose VeroBlue and 3D printed the statue on the Objet500 Connex3, the latest machine available from Stratasys. The color allows for the light and shadows to be very clearly defined, showing off the fine detail of the model.
What other materials could the Fathom team have used for this application?
Tony: We could have also achieved excellent results from any one of the Vero family of materials (PolyJet Technology). The properties are all very similar and allow for very high resolution printing on the Objet Eden and Connex systems.
In the article, Artifacts to life Through 3D Printing on Mashable.com, writer Sara Afzal talks about how the Smithsonian is using 3D printing to create replicas to be shown at other locations internationally — what other ways could museums be utilizing additive manufacturing?
Tony: Another useful application would be to repair and resurface missing parts. Through scanning and printing, you could take many pieces, assemble them in a 3D CAD package, heal the small missing surfaces and cracks and create a solid model to show what all of the pieces had originally looked like. You can also create patterns for investment castings. There are some materials with very low ash content that allow you to burn out the patterns directly, making beautiful replicas of metalwork.
The article also talks about how many of these artifacts are available as digital models for download. Many historic artifacts can be found on the internet, like the Nike Goddess that was made available in 3D CAD for download on Thingiverse last year. The statue has more than 22,000 downloads — why do you think its so popular in the 3D printing community?
Tony: I think there is a unique beauty found in the juxtaposition of building some of mankind’s oldest and greatest artistic achievements using one of mankind’s newest and most innovative technologies. And, it looks cool.
Archaeologists from around the world have been integrating 3D printing into their programs for many reasons such as restoration efforts, but also, laser scanning these relics for 3D printing replicas that can be shared around the world at other museums — can you explain this process, from scan to build?
Tony: The scanning is most often done remotely using very expensive light sensing equipment. The object is staged using specific backgrounds to amplify the detail of the scan and to set the object in question apart from its environment. The scan data is collected in what is referred to as pointcloud data. It looks like millions of dots that group together and when taken in all at once, they form the shape. That data is then run through a serious of specific applications to knit all of those points into a solid object — it’s like an amazingly complex “connect the dots.” This takes the data from being a number of unconnected points to a single solid made of polygons. Once you have those polygons, it is a relatively simple step to change the file into the .STL format needed for a 3D printer.
What are some common problems or issues that your team encounters when working with files generated through laser scanning?
Tony: Usually we run into very poor file quality. If the person doing the scan and data prep isnt highly skilled, it is likely that the file will be full of gaps in the geometry. This can be difficult to deal with because it requires some complex patchwork to create a “water-tight” file.
Also, it is more difficult to deal with scan data because it is always a very large file. The surfaces are usually organic and require a huge number of polygons to create a high resolution.
Do you have any advice, such as best practices, for prepping these files before they go to 3D print?
Tony: Make sure your .STL is watertight. Or, hire an expert to do the scanning.
Thanks, Tony. What else should readers now about this build?

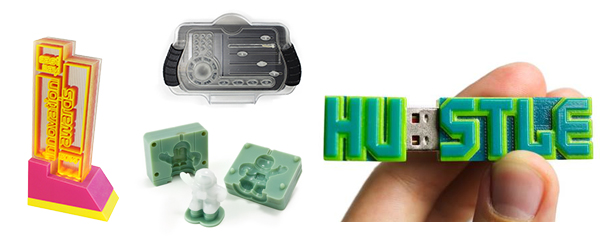
Tony: Building this statue in PolyJet materials on a Connex 3D printer is a great example of its resolution capabilities —the application uses are endless, from electronic enclosures and medical to architecture and entertainment. These 3D printers feature 16-micron layers with accuracy as high as 0.1 mm for smooth surfaces, thin walls and complex geometries, the one and only technology that supports a wide selection of materials with properties (from rubber to rigid and transparent to opaque).
Also, this technology allows users to print parts in multiple materials in a single build cycle. What does that mean? Users can selectively position multiple materials in one printed prototype and even combine two or three materials to create composite digital materials with distinct, predictable properties. This enables prototypes that contain rigid and soft-touch components or overmolding to be stronger than ever and lets you incorporate clear and Digital ABS features into one build.
