Model Finishing for 3D Printing / / 3D Printed Computer Mouse
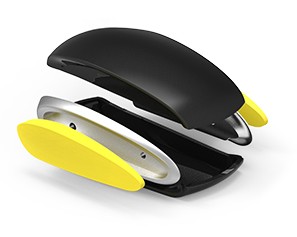
A variety of post-processing techniques can be applied to 3D printed parts, resulting in models that simulate the look of injection molded products and advanced tooling applications. From sanding, painting and texture to custom artwork, complex assembly and stock components, you can create production-like quality parts using your FDM or PolyJet 3D printer. To learn more about model finishing, we met with Dylan Oliver and Tom Kloucek in our Seattle 3D printing production center. Tom recently finished sanding and painting (in Fathom colors, of course) a 3D printed computer mouse. The CAD model was also created in-house by Tom, designed specifically for this application so he could show off some modeling finishing options for 3D printed electronic enclosures.
After you read the blog, give it a try then send us photos of your finished 3D printed computer mouse. Or, you can upload your CAD model to smartquote.studiofathom.com and well 3D print one for you (dont forget to check the model finishing box). For more information about 3D printing in Seattle, contact us.
So, first off, why did you choose to 3D print and finish an electronic enclosure?
Dylan / / Consumer electronics is a huge market for us and we felt a computer mouse form would be something everyone can relate to and understand and also offered an interesting form factor from a finishing standpoint… curved models are not as easy to finish.
Tom // I was looking to create a Fathom branded product that could relate to our clients and show off some of our finishing services. Our Seattle production center is surrounded by many tech design companies and several of them design similar products such as a computer mouse. Although this is an appearance model, the same 3D printing technology can be applied to creating a functional prototype, as well.
Fathom has a variety of 3D printers to choose from—what 3D printing technology did you use and why?
Tom // The PolyJet Technology has the best resolution for this type of application. The material has a great surface finish and it sands very well. The same high resolution that creates a model for easy painting, can create models with high tolerances to test fits and assembly. For any moving parts or snap fits, you really need to validate it before you move to tooling and production. It is the best feeling when all of the parts slide together just right and the snaps click perfectly. After testing all the fits, then you can have the confidence to move into production.
Dylan // Also, if you have to integrate any off-the-shelf components such as a motor or a custom PCB, 3D printing is the best way to validate your CAD files. With some of the advanced materials such as the ABS-like digital bend polymer and digital Tango blend for flexible parts, 3D printing can simulate final production material characteristics.
Model finishing can be applied to both FDM (fused deposition modeling) and PolyJet (UV-cured photopolymers) created parts—what’s the difference between these two and why would someone choose one or the other for an electronic enclosure?
Dylan // FDM is great when you need really tough production strength finished parts for an end use application, perfect for a final product scenario that needs long term durability. Typically, there are more steps involved with finishing an FDM model when you want to achieve a high quality finish. For those types of 3D printed parts, we use a Bondo-like filler putty, 220 grit and high build primer as the foundation. With the PolyJet Technology, you have a much higher resolution surface from the beginning, so you get to painting in fewer steps. Both technologies have their benefits and it really depends on the application requirements.
There are many factors to consider when you want to apply model finishing to a 3D printed part. Tony Slavik, Fathom’s Prototyping Studio Manager in Oakland, recently discussed these key considerations in a write-up available on our website—what post-processing techniques did you consider and why?
Tom // I designed this model to be flashy, to catch attention using Fathom’s bold company colors. I wanted to use metallic for the main body, a gloss over the yellow and chrome or silver as accents. I am planning a few other versions that include graphics, such as a logo and possibly some stock components like small hardware. Just as Tony mentions, there are a lot of options and its fun to think creatively about it. The Fathom team is always working on new techniques that pushes the boundaries of what is possible for 3D printed parts, on how to use various methods that make our customers models stand out from their competitors.
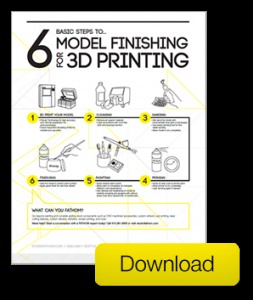
Proper preparation before painting a model is critical (such as sanding and priming) in order to achieve the look and feel of a finished product—can you walk us through the steps you took to create the Fathom computer mouse?
Tom // For the body and yellow inserts, I sanded to 320 and used a little red glazing putty. Then, I sanded to 400. Primer came next, a sand-able filler primer. I sanded the primer to 400-600. Then, I repeated the primer step and sanded again until it was completely smooth. Then, I applied a top coat. For the silver rings, I followed the same steps up except I used a glossy black paint. I followed that up with a chrome finish-looking paint and I was ready for assembly.
Do you have any tips and tricks? What works and what doesnt work?
Tom // Its really critical that a proper amount of time is spent on the prep work. Once you get that done, you can play around with different paint combinations. Often times, we are matching specific Pantone colors, but we also work on projects where we can play with various color options. The Fathom team sets aside time for us to work on internal projects, so we can test out new industry techniques or come up with our own unique practices.
