3D Printing for Medical Packaging / / Medical Packaging Products
3D Printing for Medical Packaging—Shifting the Design Cycle
Universal Protective Packaging, Inc. (UPPI), an industry leader in thermoformed protective packaging, has embraced 3D printing in product development. Creating packaging for medical products poses special challenges—an elevated need for sterility, repeatability and durability—and UPPI uses 3D printing to prove out packaging designs rapidly, ultimately boosting the speed of their entire design and production process.
Fathom sat down with UPPIs 3D printing experts to discuss the unique challenges of working with the medical industry and their utilization of both additive and traditional manufacturing in their development process.
From Prototype to Production with Confidence
When creating a new product, what is the typical timeline for development? How many iterations do your products normally go through before being completed and offered commercially?
In most cases, a 3D printed mold can be completed in a 24 hour time period. Another day is allotted to form samples using the 3D print. On average, one 3D print is all it takes before a customer will move forward with a production mold. Customers are normally looking to physically see how their package will look and function. Once they are satisfied the package will work, they move to the next step in getting their product to market.
For example, in a recent partnership with a catheter manufacturer, 3D printing became an integral part in the determination of the success of a package design. After review of an initial 3D print, it was determined that their product would retain the memory of the coiled shape it took when in the plastic tray. This made the catheter difficult to use. Having the ability to test their designs through 3D printing allowed them to make the decision to take the package design in a totally different direction before a move to production (pictured below, first Iteration—the coiled packaging created a memory in the product, so the designers needed to make a significant change).
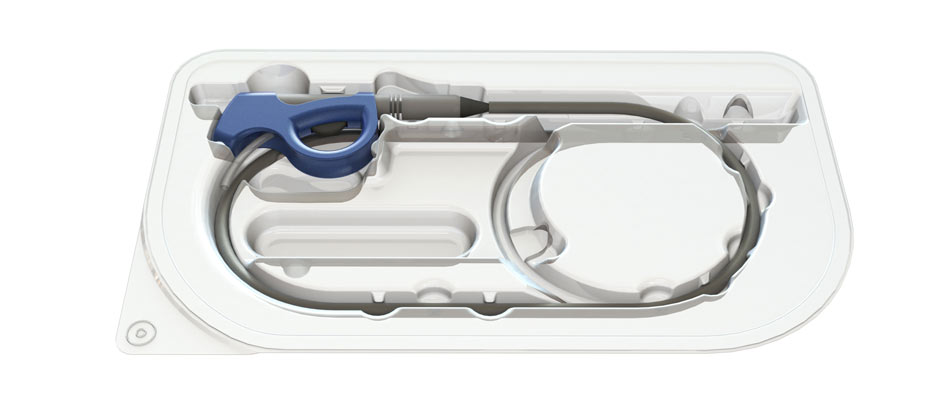
As the package that coiled the catheter failed the practical tests performed by the medical device manufacturer’s engineering group, it was back to the drawing board. If the catheter had to lay flat during transit and storage, the package had to get substantially longer. The dimension went from almost 20” to 58”! However, the width of the package could be dramatically reduced from 11” to 5”.
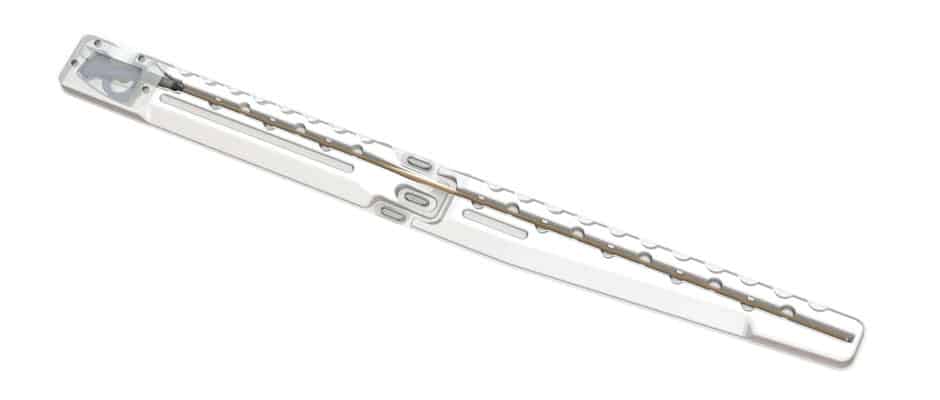
Another challenge to overcome was the storage and transportation of such a long tray. These factors directed the UPPI design team to develop a tray that would be made up of two smaller trays. To connect the two pieces to create the 58” long tray, a locking system had to be devised. To test the strength of the system, UPPI’s design team created 3D printed models on one of the in-house 3D printers. After a few tweaks and another rapid prototype, a sample of the locking mechanism (pictured below) intended to be utilized in the design for a 2-part medical device tray was sent to the customer along with the design for approval. Being able to see and test a functional representation of the locking system gave the client the confidence to move the project to the production phase.
With the catheter packaging, having a 3D printed version of the initial prototype seemed to inform the critical decision to alter the entire design—can you estimate how much time and cost was saved by having a testable model before moving to production?
Molds used to produce production quality plastic packaging are made out of aluminum. There are some revisions that can be made to these molds as long as they are, what the industry terms as, metal-safe. Metal-safe simply means material can be extracted from the mold to accomplish the desired revision. However, since the catheter manufacturing company wanted to change the overall package size, a new thermoforming mold would have been required had they moved directly to a production quality mold with the first version of their package. Had they not prototyped the first version of the package, their tooling costs would have been doubled. The timeline would have been doubled as well without the use of 3D printing. So, in essence, they cut their time to market in half and their costs in half with the use of 3D printing.
UPPI considers numerous factors when designing a package, including effectiveness, cost, environmental impact and user experience. What advice would you give to others who aim to innovate products that have gone unchanged for decades?
3D printing allows you to explore your imagination. If a product has gone unchanged for decades, use 3D printing technology to test subtle or drastic changes to an element of the product. See what happens to the functionality of the product. Does it make it better or worse? Continue exploring until a better product emerges. The affordability and efficiency of 3D printing makes it possible to innovate in ways we would have never dreamed about before its existence.
Design Advantages with 3D Printing
Fathom finds that companies incorporate 3D printing into their business for a variety of reasons, often for prototyping, mechanical testing or creating end-use parts—when UPPI decided to invest, what was the primary motivation to purchase a 3D printer?
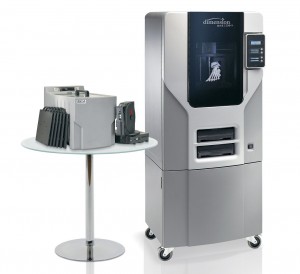
UPPI recognized the value of having a 3D printer on site to use for functional testing in R&D, as well as having the ability to offer an additional service to our customers. Our design team often comes up with innovative ways to solve problems presented by either a customer or a challenging design element.
Having a 3D printer on site allows our design team to quickly and affordably assess if the design path to solve a problem will result in success. Over the last 5 years, our customers have come to rely on rapid prototyping. They take advantage of this service to determine if a package design will meet their needs and to supply their sales teams with a physical sample of the final product for presentation purposes.
When designing your packaging, are there any specific advantages you see from integrating 3D printing into your design cycle?
Absolutely! 3D printing has proven time and again to reduce overall packaging costs and to get product to market faster. Taking the short amount of time required to print a 3D thermoforming mold and form samples or to print a design element for functional testing greatly reduces the likelihood of costly tool revisions later down the road. A nominal charge at the beginning of the design process is better for the bottom line than an expensive tool revision or a remake of a tool right before production is needed.
3D Printing Methods—Materials & Designs
Does UPPI incorporate any of the fill patterns available to 3D printing in your packaging products, in order to increase their weight efficiency?
Typically, a low density sparse fill pattern is used when we print prototype thermoforming molds. This fill pattern’s honeycomb structure creates vacuum channels necessary for forming plastic over the 3D pr

