3D Printing Photographs + Contest
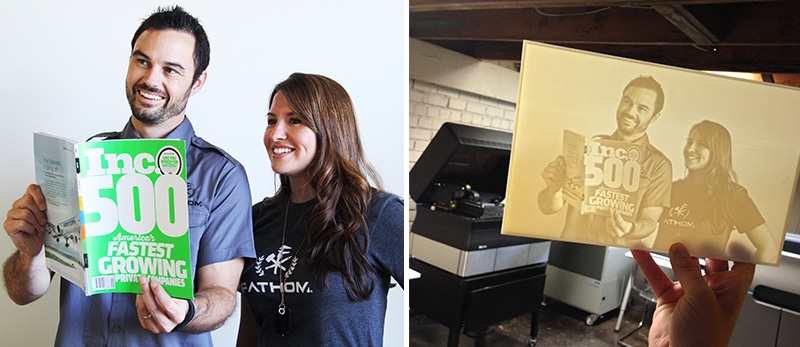
In celebration of Fathom’s second year on Inc. Magazine’s annual list of America’s Fastest-Growing Private Companies, we opted to 3D print a photograph of Rich Stump and Michelle Mihevc holding the September issue announcing the highly anticipated company rankings. To learn more about this project, we met with Industrial Designer Veronica De La Rosa. Tell us about the process of turning a digital photograph into a 3D printable CAD file?
Veronica: We were inspired by an Instructables post from Amanda Ghassaeion on 3D printing photographs. The user demonstrates how to use processing to algorithmically model 3D geometries based on black and white images. The final file was 3D printed on an Objet500 Connex in a rigid, semitransparent white material.
After doing some research and referencing a past project where we were trying to apply a highly intricate texture to a complex surface, the Fathom team realized we could use the same technique with a photograph to a much simpler, flat surface using RHINO CAD software. The command name in Rhino to do this is ApplyDisplacement. This will allow you to deform a surface based on the grayscale of a texture. In this case, our texture was a photograph of Fathom Principals Rich Stump And Michelle Mihevc.
What was most challenging about this application?
Veronica: We encountered a challenge when determining the best thicknesses to set our maximum height and minimum height which correlated to our darkest and lightest hues in the photo. These thicknesses would determine how much light passes through the 3D printed part. After reviewing some material samples in our production center, we found that a mininum of 1.5mm was thin enough to let light pass through yet strong enough to be structurally stable. Our max height on the piece was set to 3mm.
We got started by applying the displacement map, in this case the photograph, onto a flat surface the size of the print we wanted. This created a mesh that was just a surface (not a solid). Then, sides had to be extruded and the back was capped, creating a watertight surface. Since the resulting surface of the displacement map is a mesh, there is no need to convert the surface to a mesh. When exporting a NURBS to an .STL, one typically needs to adjust resolution settings accordingly.
Are there limitations with this software for this application?
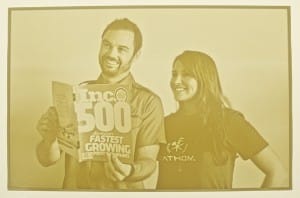
Veronica: I really don’t think so. We actually printed probably one of the hardest thing to get right — human faces and features. Honestly, the team was quite worried when we first reviewed the model in RHINO because the faces looked rather deformed. Yikes! But as you can see from the photographs (right), it is pretty amazing how something that looks so incredibly illegible (and almost freaky) can look literally photo-realistic with just a little bit of light behind it. There are no limitations when it comes to the settings of the photo. Whatever the photo looks like, that’s how the print will look. So, if you do this to a low resolution image, the 3D printer will also be lower in quality. This is because the ApplyDisplacement command is simply using the gray tones in the photo to determine the thickness in the model.
Fathom offers FDM, PolyJet and SLS technologies at its Oakland and Seattle production centers — what 3D printer and material did you choose and why?
Veronica: This design was 3D printed in VeroWhite on one of our Objet 30 PolyJet-based 3D printers. We chose this technology and material type because at thinner sections it becomes translucent, which is ideal for this application when the result is dependent on light passing through the piece. We haven’t tested it yet, but I’m sure the same effects could be replicated in other Vero materials that get translucent at lower thicknesses such as VeroBlue and VeroGray. Cant wait to try these out as well!
3D printers with vivid color options are growing in popularity — could someone 3D print a photo like this using different colors?
Veronica: I think this is definitely a more involved process but something that is doable. In addition to using the displacement map, you would have to breakout each color in the mesh into a separate body. I am not aware of a command in RHINO that can do that as of this interview, but I’m sure there is some means to achieve this with other software or scripting. Stay tuned and maybe our next blog will feature a 3D printed photograph in full color!
Want Fathom to 3D print your favorite photograph? That’s right! We are hosting a giveaway. Fill out this form for a chance to win. One lucky applicant will work with Fathom to 3D print their favorite photograph at no charge. Really? Yes, really! Submit your name and contact information for a chance to win. Fathom will announce a winner in November 2014.

